
 373
373
Introduction
Sessions can be set up as one-time events or to repeat, saving you the time and effort of recreating recurring events, such as weekly team meetings or monthly webinars. When setting up a session that repeats, several options are available, allowing flexibility for daily, weekly, monthly, and annual cadences.
Table of Contents
- Use Cases
- Choosing a Frequency
- Set an End Date
- Who can Join?
- Session Information and Settings
- Copy a Session
- Related Articles
Use Cases
Single Sessions
-
If you’re offering multiple options for the same presentation - i.e. attendees can choose from 4 different dates/times but will only be attending one.
-
Attendance will be tracked per session
-
When members click to attend, they will only be set to attend that single session
-
 Note: Copying sessions is an available feature
-
Recurring Sessions
-
If you’re offering a series where attendees should attend all, for example, a monthly board meeting or a weekly team meeting.
-
When members click to attend, they will be set as an attendee for the entire series
-
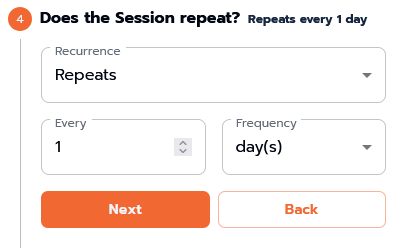
Choosing a Frequency
When selecting Daily:
-
Choose a numeric value if it will be every day or if it will be every 2 or 3 days
-
This will include all 7 days of the week in the calculation
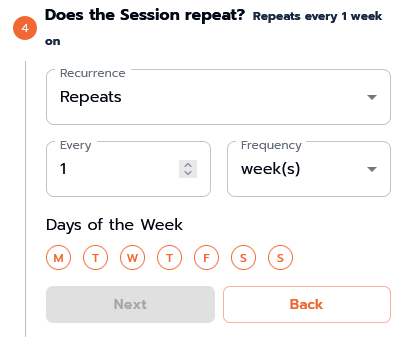
When selecting Weekly:
-
Choose a numeric value if it will apply to every week or if it will be every 2 weeks
-
Choose the days of the week (Monday through Sunday) - this is a great alternative for the Daily cadence, since this will allow the option to exclude weekends.
When selecting Monthly:
-
Choose a numeric value if it will apply to every month or if it will be every 2 to 3 months
-
Choose between a set day of the month (i.e. 24th) or a relative day of the month (i.e. Fourth Wednesday). These will be suggested and calculated based on your start date.

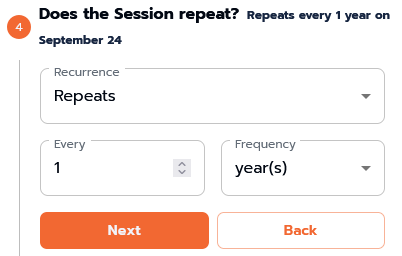
When selecting Annual:
-
Choose a numeric value if it will apply to every year or if it will be every other year, for example.
Set an End Date
Choose between three options:
-
Never end
-
End on a specified date
-
End after a specified number of occurrences
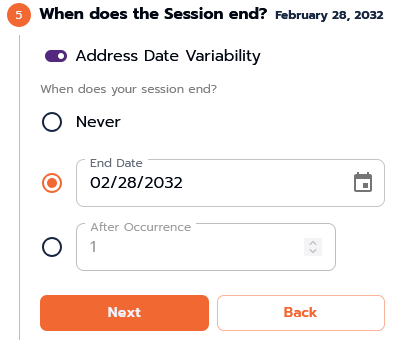
Why do I have an option to "Address Date Variability"?
A toggle to “Address Date Variability” displays for the monthly frequency since the number of days per month vary - i.e. the 31st of the month when some months have 30, 29 and 28, and allows the option to have it automatically adjust.
-
When checked: “Dates will fallback to the last day of the month or the last weekday of the month if a month doesn’t have the specified day.”
-
When unchecked: “Dates are specific and any month that does not have the specified day will not be included in the recurrence.”
Who can Join?
Previously, anyone with a session link who was a community user was able to access sessions within groups they were not a member of when a session link/url was shared with them. We’ve locked down permissions to just group members; however, we have implemented the flexibility for group admins to choose if meetings they create within their groups are exclusive to group members or if all community members can join. This will also prepare us for additional permission options in the future when public access becomes available.
Community Sessions
When creating a session on the community platform (i.e. “Global Session”), the only option that is available is to allow “All Community Members” to join.
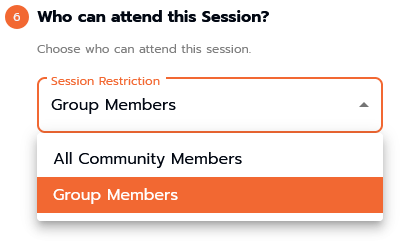
Group Sessions
When creating a session within a group, there are two options available:
-
All Community Members
-
Group Members
All Community Members
-
Sessions that allow all community members to attend will display on the global session schedule as well as within the group meeting schedule.
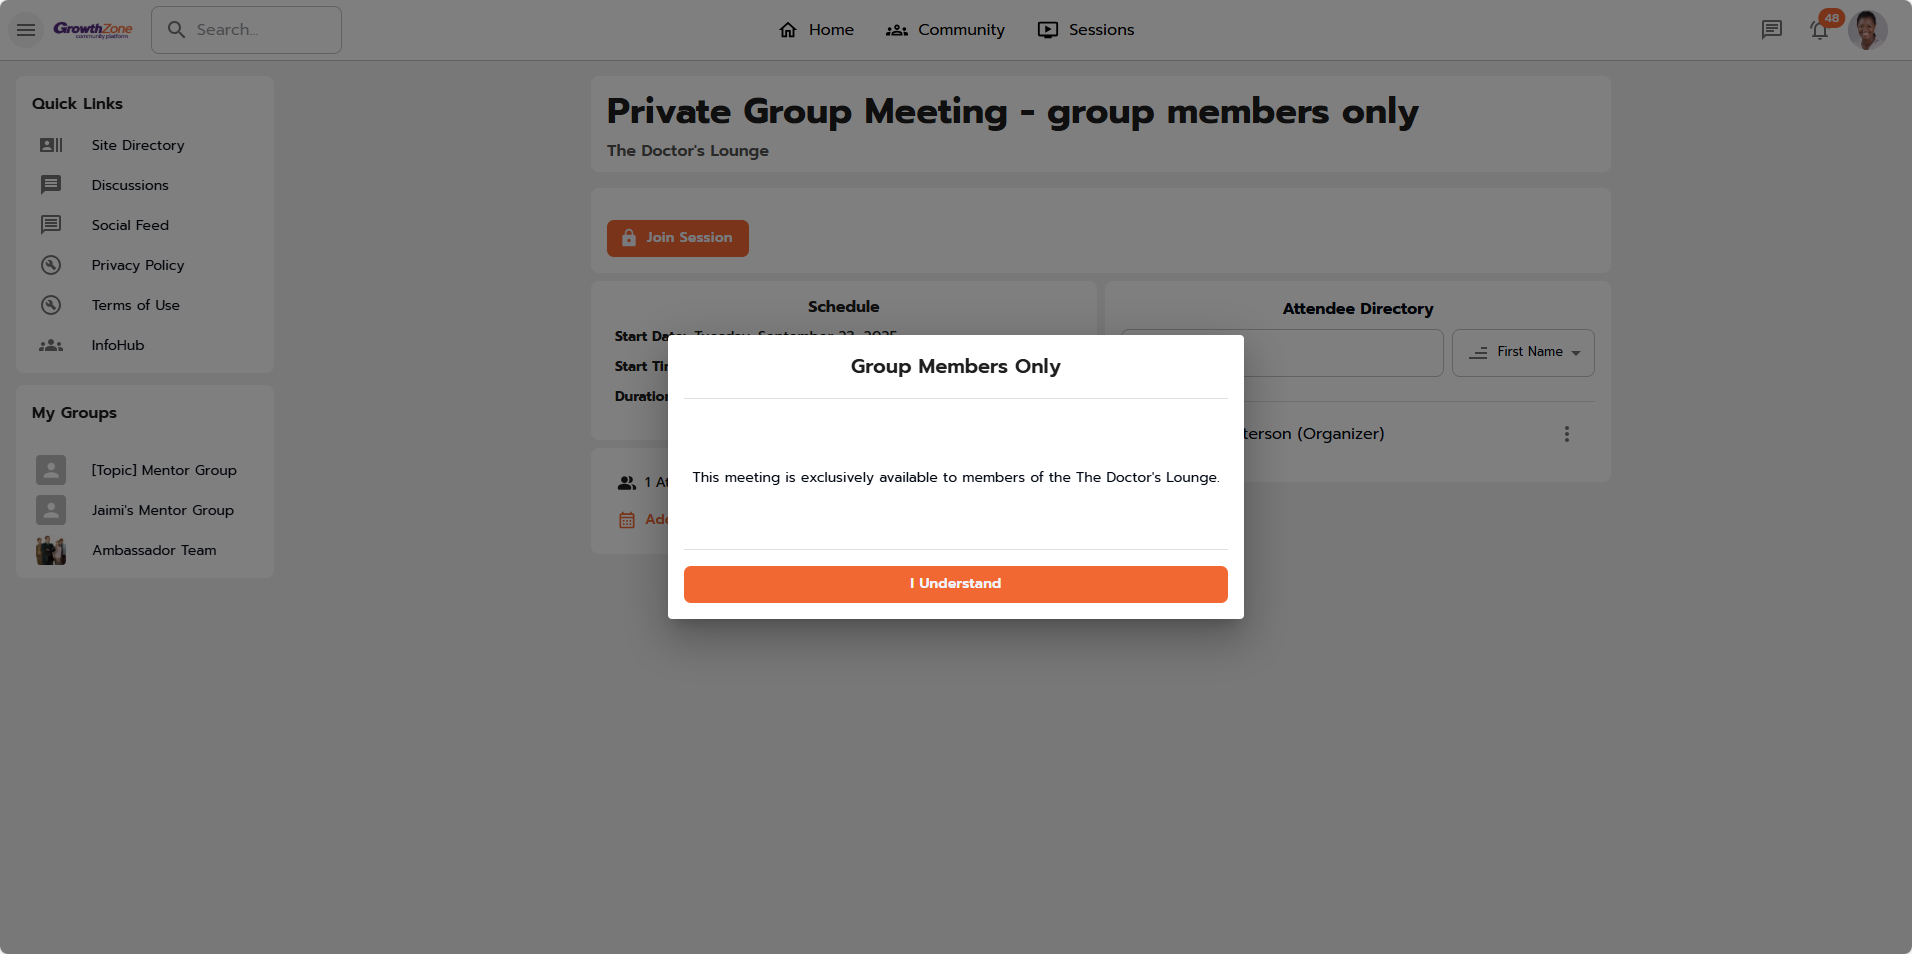
Group Members
-
Sessions that only allow group members to attend will only display on the group meeting schedule.
-
If a community member receives a link to a group event they do not have access to, the attend and join button will have a lock icon and, when clicked, a popup message will display alerting them that the session is for group members only.
Session Information and Settings
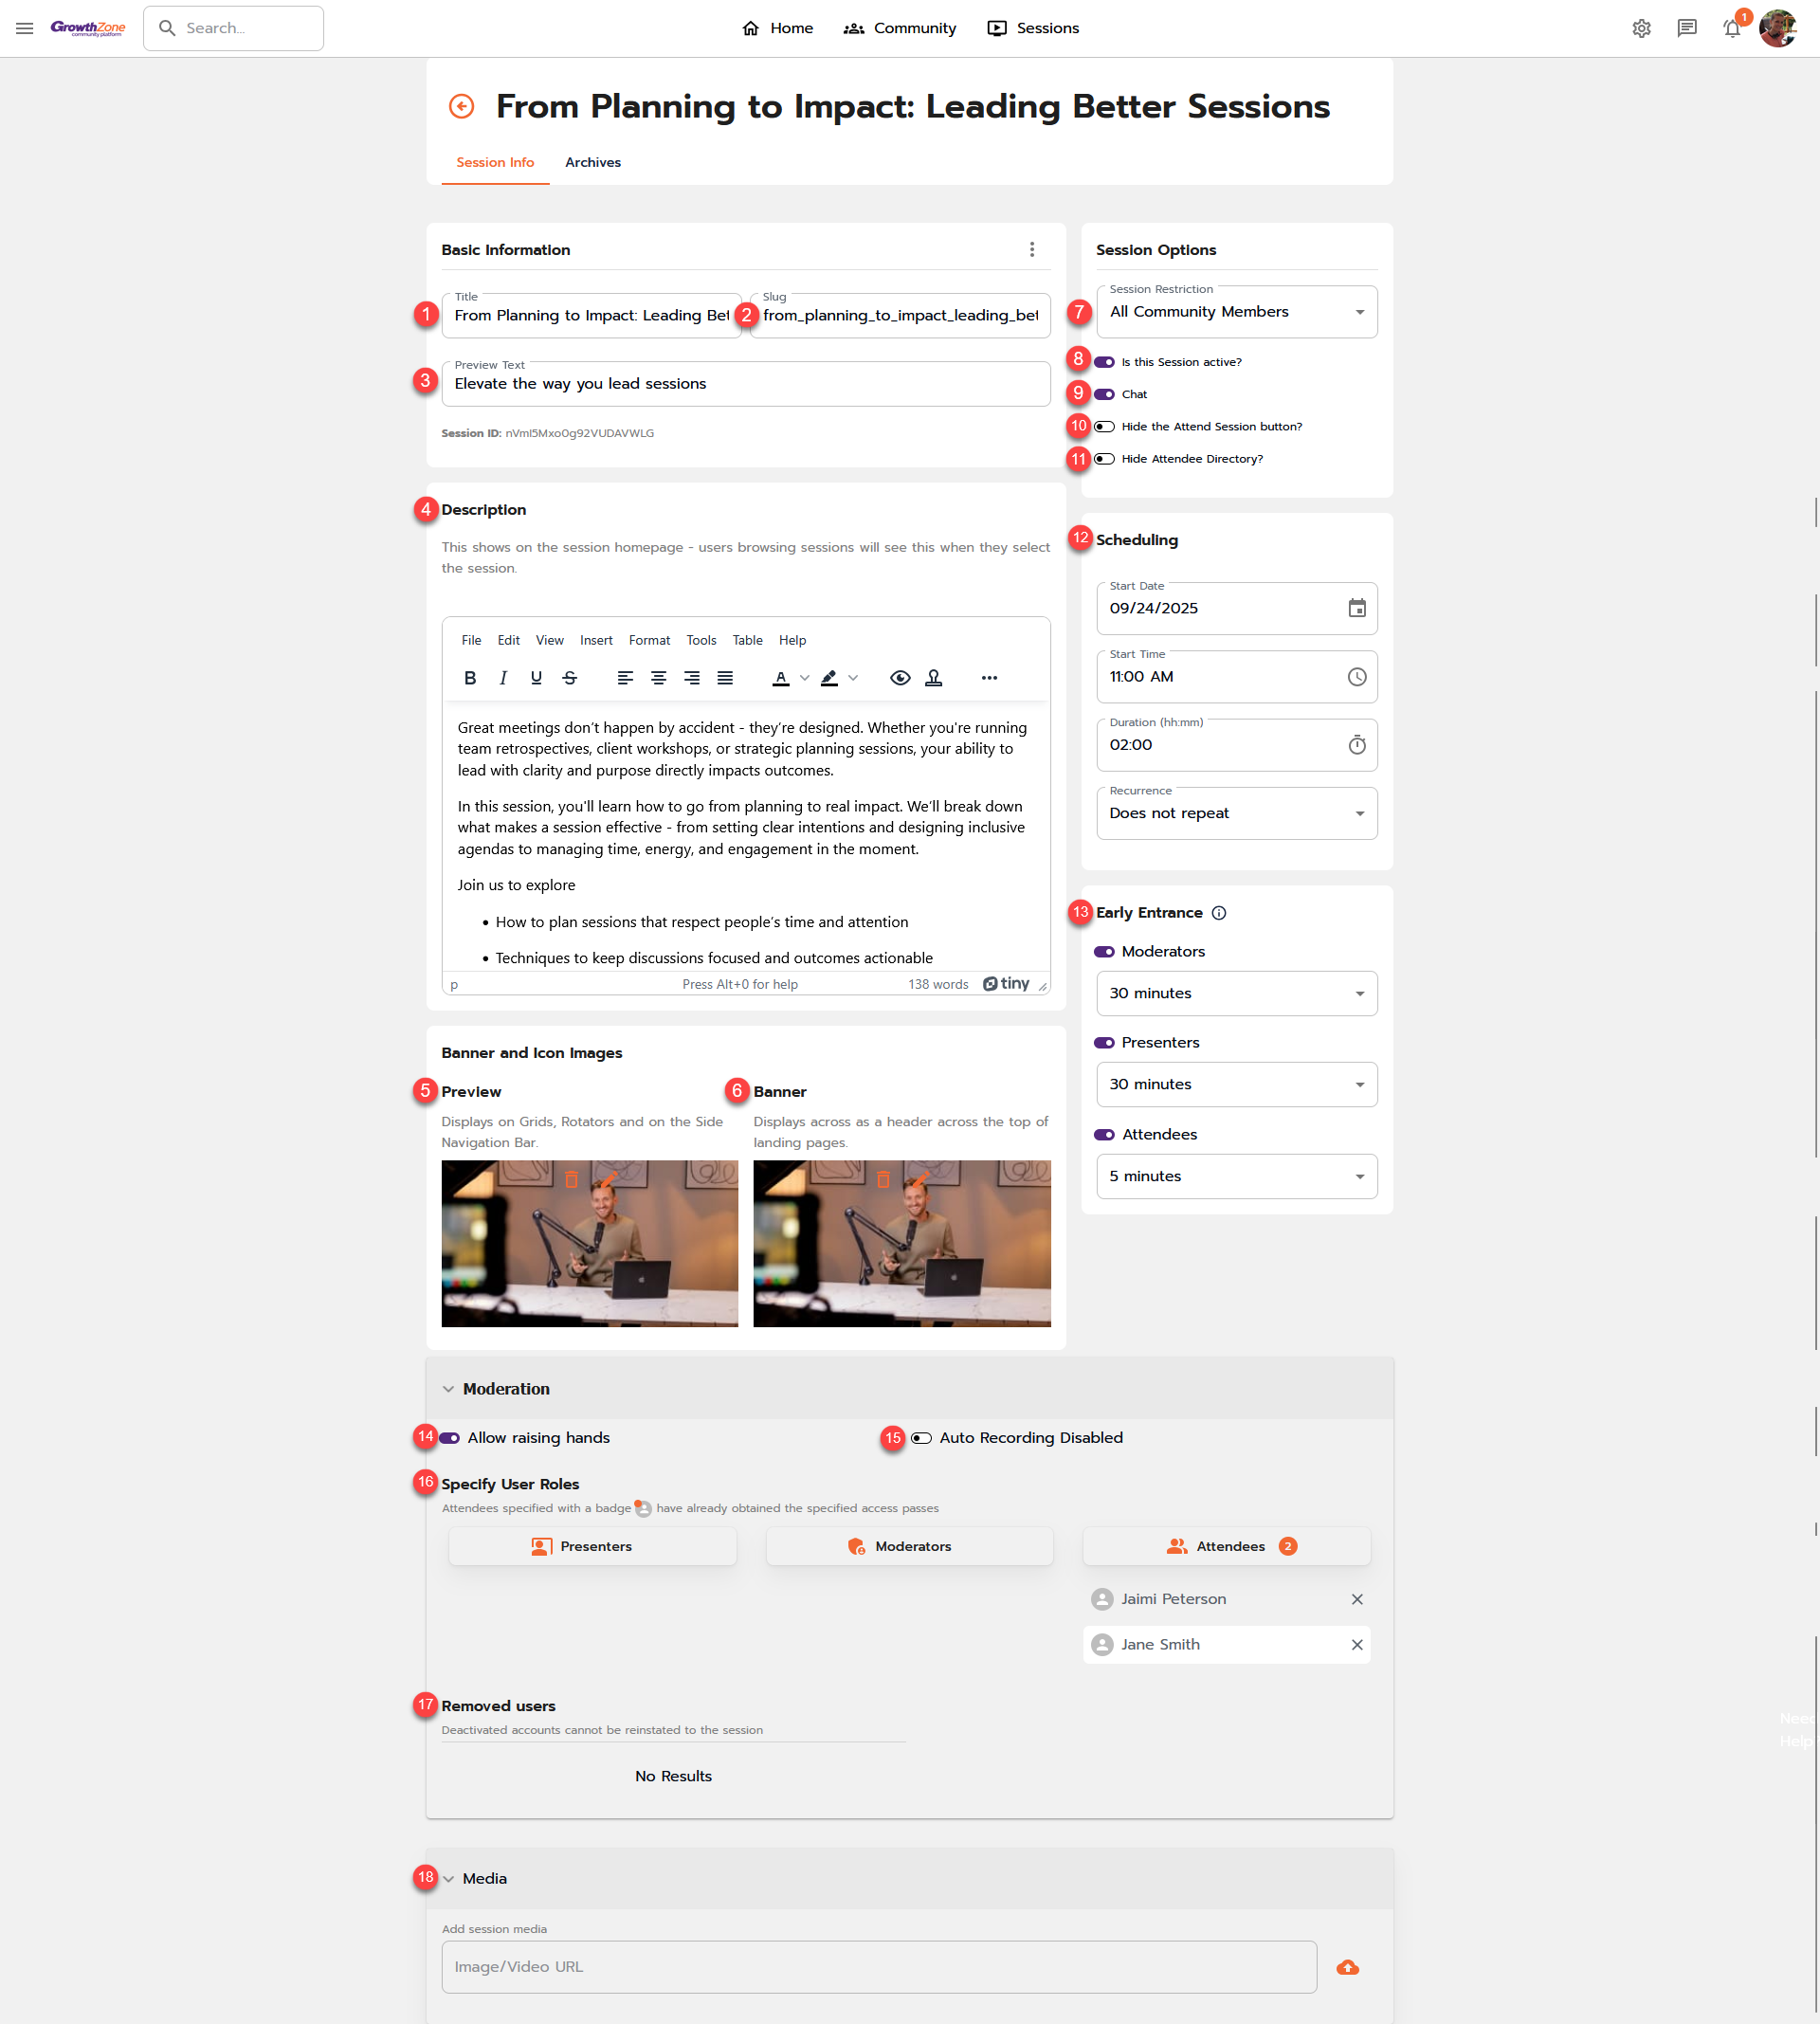
Let’s do a high-level overview of all of the information and settings available when setting up a session.
Basic Information
Title 
-
This setting displays what was selected when the session was created, however, can be modified here as needed.
Slug 
-
This setting displays what was selected when the session was created, however, can be modified here as needed.
-
The “slug” will not automatically update when changes are made to the session title/name.
Preview Text 
-
An optional short description that will display on a rotator or grid module, as well as display on the schedule list view.
Description 
This shows on the session homepage - users browsing sessions will see this when they select the session.
It will also show within the info tab while in a session.
Use the wysiwyg to enter and style your session details. Although it allows for images and other media, it is recommended to keep this as text only and utilize the other session settings to:
-
Set the images used to display the session on the schedule
-
Set the banner image
-
Attach your agenda and other supporting documents
Banner and icon Images
These two image settings allow you flexibility for the session image that displays within grids, rotators and the schedule page, which may be different than the image you'd like to have appear as the banner at the top of the session page.
Preview 
-
Displays within grids, rotators, and the schedule page.
-
Recommend a 4:3 image ratio
Banner 
-
Displays at the top of the session page as well as the email notifications
-
Recommend a 16:9 or 25:8 image ratio
Session Options
Session Restriction 
As noted above, global sessions are available to all Community Members. When creating sessions within groups, they can be restricted to only group members or they can be opened up to all Community Members.
Is the Session active? 
This setting is defaulted to have the session active, however, can be toggled off so that it cannot be viewed by Community Members until it is ready to be published.
Chat 
Choose if the chat feature will be enabled for the session.
Hide the Attend Session button 
Are Community Members able to sign up to attend the session? If so, keep the button visible. If not, toggle this setting so that it is hidden. You can then add the attendees that should have access to attend
Hide Attendee Directory 
Choose if the attendee directory will be visible on the session page.
(Please note, this does not impact the visibility of attendees while in a session. The attendee list while in a session is always visible.)
Scheduling 
These settings display what was selected when the session was created, however, can be modified here as needed.
-
Start Date
-
Start Time
-
Duration
-
Recurrence
Early Entrance 
NEW You may allow all participants to enter the session earlier than the start time based on their role. For example, Moderators and Presenters can be allowed in earlier than all other attendees to prepare.
Enable the toggle for each role and choose the amount of time they are allowed to enter early.
-
Moderators and Presenters will be defaulted to 30 minutes
-
All other attendees will be defaulted to 5 minutes
Moderation
Allow raising hands 
Choose if you'd like to allow session attendees to raise their hand during the session. This is enabled by default.
Auto Recording 
Choose if you'd like the session to automatically record when started. This is disabled by default, however, even with this setting disabled, the recording can be started and stopped manually.
Specify User Roles 
-
As the person creating the session, you will be given an "Organizer" role and are added as an attendee. You will have permission levels equivalent to those assigned as a presenter or moderator.
-
Presenters have moderator permissions and are highlighted on the session page.
-
Moderators have that permission/role, however, are not highlighted on the session page.
-
Attendees are those who have clicked to "attend" or have been added by an admin, organizer, presenter or moderator.
Removed Users 
NEW Attendees who are removed from a session while it is in progress will display here.
Learn more about this feature here: [Insert Link]
Media 
Upload your agenda or any other supporting documents. These are available on the session homepage - users browsing sessions will see this when they select the session.
They will also show within the info tab while in a session.
The image below is numbered to correlate with the numbers noted above:
Copy a Session
-
Locate the session to copy
-
Click “Edit”
-
Under the ellipsis next to “Basic Information”, click “Copy Session.”
Additional Information
In the side drawer:
-
Step 1: Update the name of your session
-
The “slug” will automatically update based on the session title/name
-
-
Step 2: Set the start date
-
Note: cannot backdate the start date of a session
-
-
Step 3: Set the start time and duration
-
Step 4: Does the session repeat?
-
Step 5: Who can attend this session?
What gets copied?
-
Preview Text
-
Description
-
Session Options (unless the session restriction was changed in the 5 step modal)
-
Early Entrance
-
Banner and Icon Images
-
Allow raising hands
-
Auto recording setting
-
Presenters
-
Moderators
-
Media
What does not get copied?
-
Attendees
-
Removed Users


