
 1783
1783
Introduction
Sessions, within the Community platform, provide a way for you to schedule interactive meetings with your members. A session is a single talk, keynote speech, panel discussion, plenary, workshop, breakout room, networking meeting, or anything else you can think of! Whenever you want people to interact virtually, such as by turning on their camera and microphone, sharing their screen, or chatting in a live audience, that’s a session. Sessions streamed are automatically recorded and displayed on the Session archive tab.
Table of Contents
Create Sessions
- Click the gear icon in the header bar.
 IMPORTANT: If you want to set up a speaker for your session, please see the Set Up Speakers article.
- In the left-hand navigation panel, click Sessions in the Content section. The preview screen will display your current sessions.

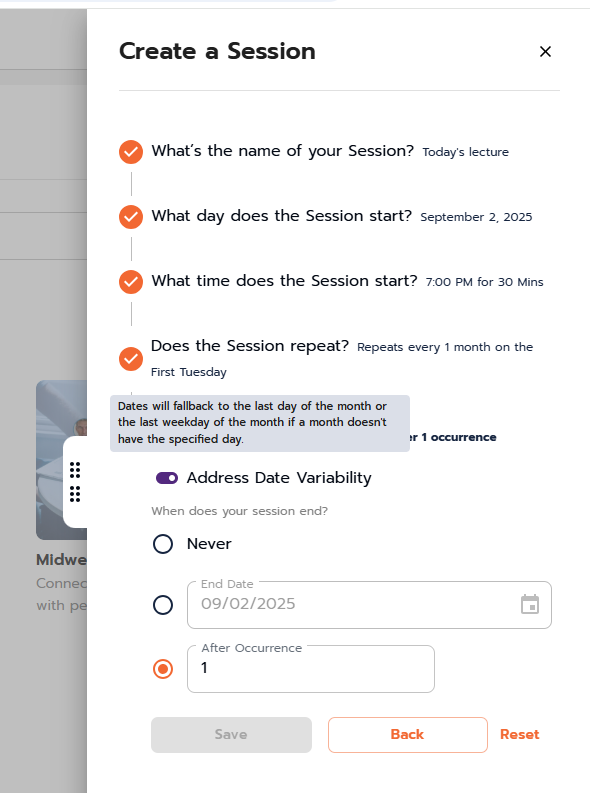
- Click New Session.

- Choose if this session repeats along with the desired cadence.
- Choose if or when the session ends.
 NOTE: Why do I have an option to Address Date Variability? A toggle to Address Date Variability is displayed because the number of days per month varies - i.e., the 31st of the month, when some months have 30, 29, and 28, and allows users to have it automatically adjust.
-
When left unchecked: “Dates are specific and any month that does not have the specified day will not be included in the recurrence.”
-
When checked: “Dates will fallback to the last day of the month or the last weekday of the month if a month doesn’t have the specified day.”
-
- Save to create the session.
- Once you save the session you will be presented with additional configuration options.

-
You can make the session active through a checkbox, which defaults to active (checked).
-
You can update the Title, Slug, and Preview text or Delete the session in this area.
- Chat: Enable this option for all to chat during the session. The audience and speakers will be able to interact in the chat window to the right of the video stream.
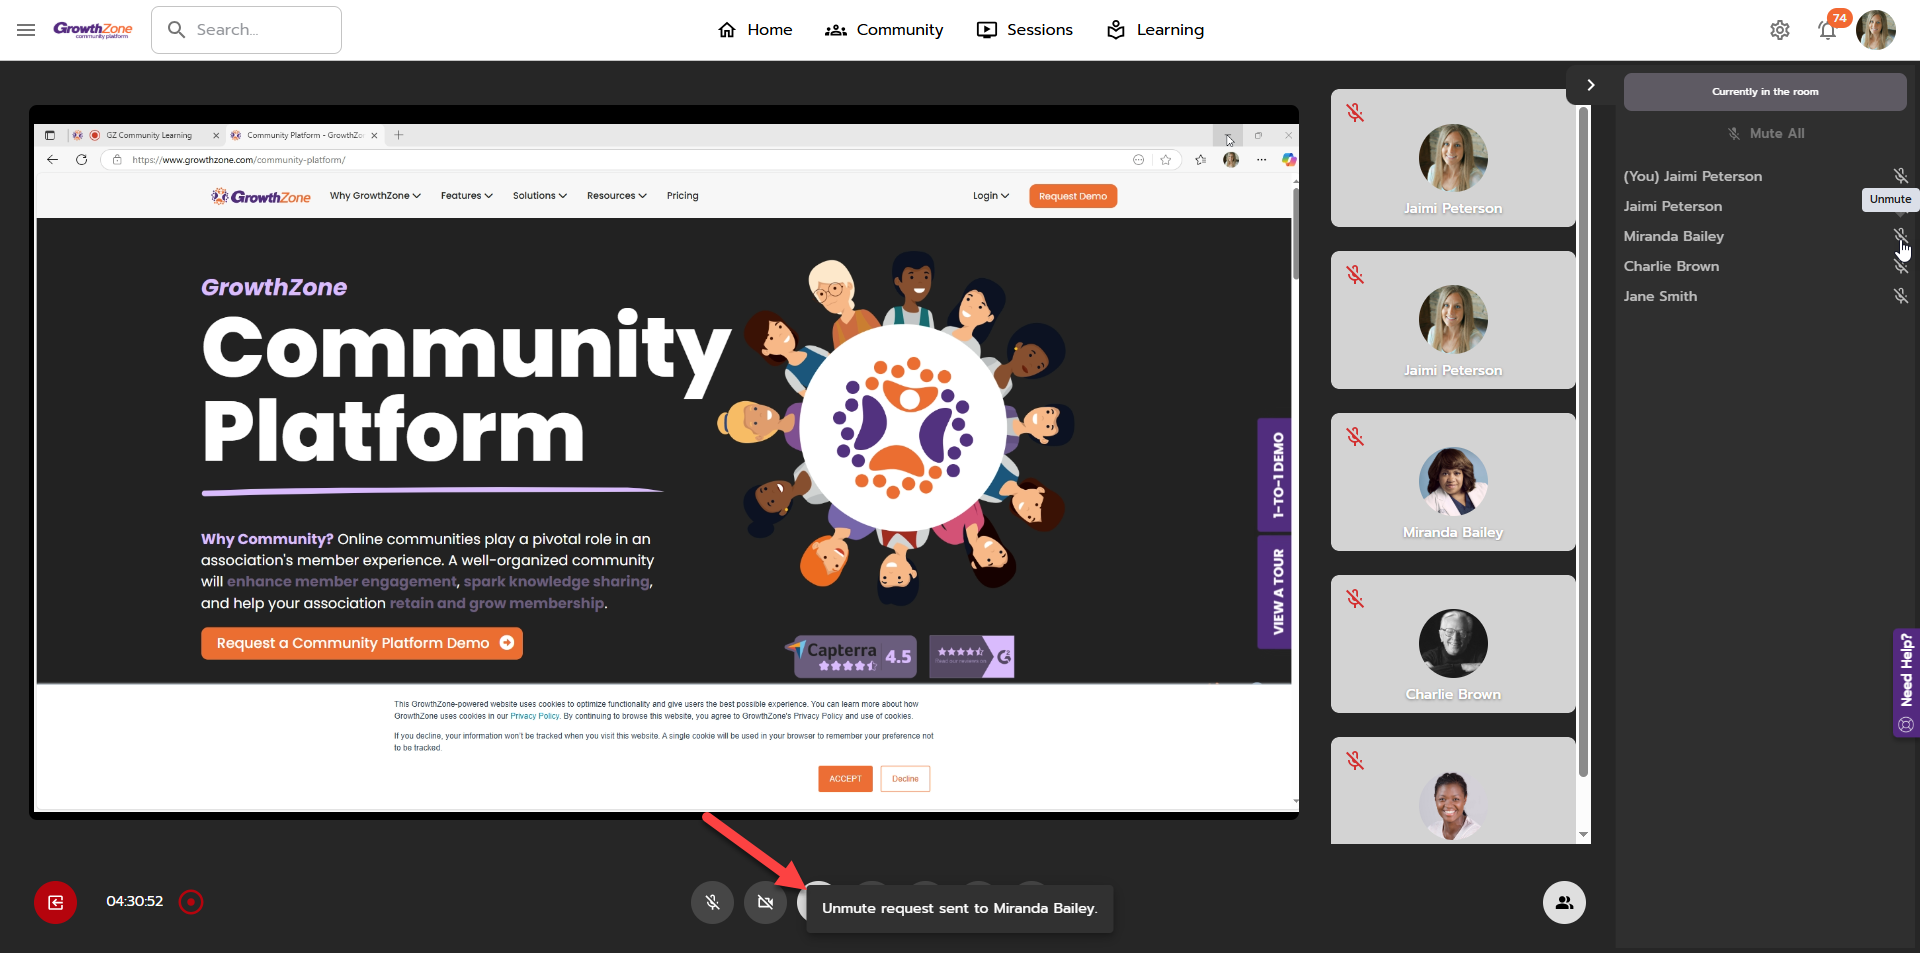
- Attendee List: This option is enabled to display the attendee list for the session.
- Mute All: Option available at the top of the Attendee List.
-
Only session admins (or users with moderation permissions) can see and use the Mute All.
-
Clicking Mute All will mute all participants except the admin who selected the option.
-
The participant received a notification letting them know "A moderator has muted you." Participants have the ability to unmute themselves.
-
-
Unmuting individuals: Moderators and presenters can send a request to unmute participants.
-
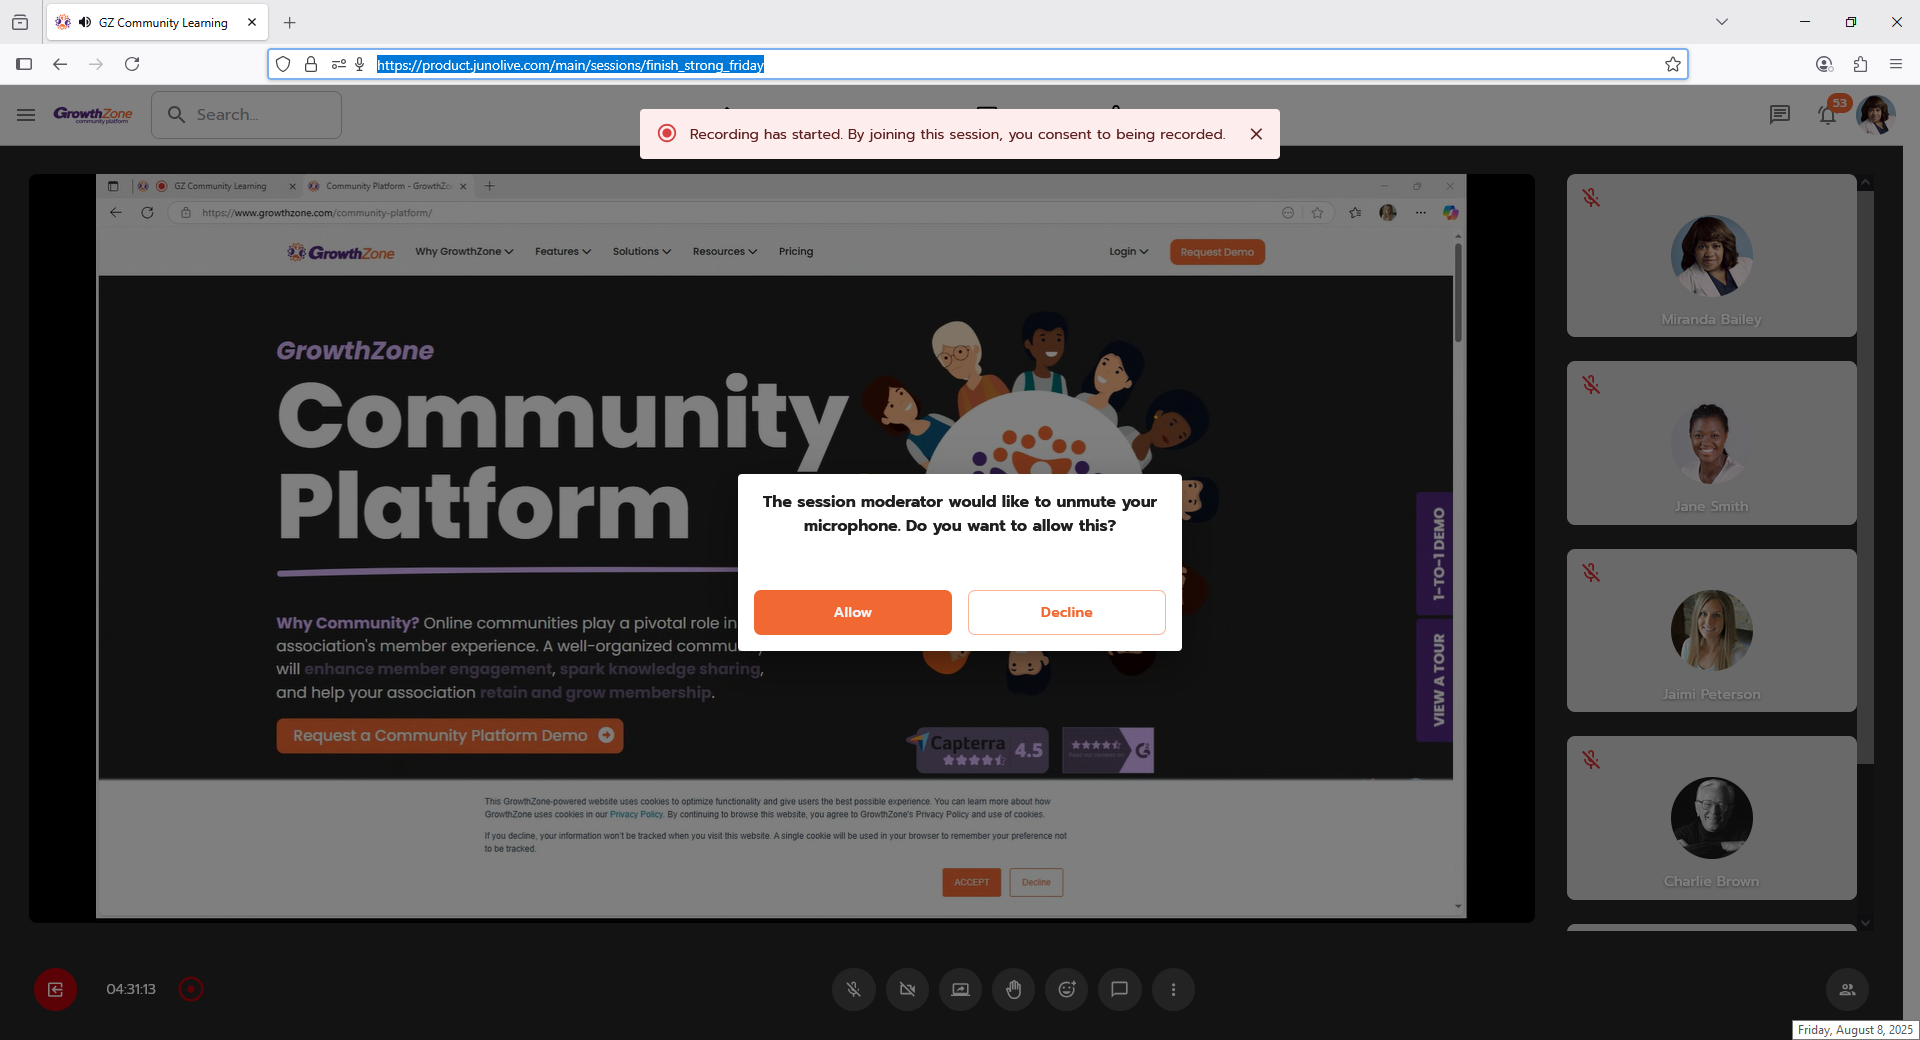
The participant receives a notification letting them know, "The session moderator would like to unmute your microphone. Do you want to allow this?"
-
If declined, nothing changes, and there is no notification back to the moderator.
-
If allowed, the participant becomes unmuted.
-
-
- Preview: This image will display in rotator, grid, and list modules. Recommended size 800 × 450 px.
- Banner: Will display at the top of the session. Total dimensions: 1440 × 461 pixels. Safe zone: 1340 × 360 pixels
- Options include specifying user roles and adding presenters, moderators, and attendees.
- Attendees sync with front-end users and are indicated by a blinking effect upon save.
- In this section, you can upload files to be displayed as Session Resources, which anyone can download from the session. Multiple files and all file types are accepted. Tested file types include:
-
Documents: PDF, CSV, XLS, ZIP, PPT, DOC (and other document types)
-
Images: JPG, PNG, GIF (and other image types)
-
Videos: MOV, MP4 (and other video types, which can exceed 10 MB)
-
Once you have completed your configuration, click the Save button in the upper-right corner of the Sessions page.
Recording Sessions
Individuals joining a session that is being recorded will receive a notice: 'Recording has started. By joining this session, you consent to being recorded.' This notification will appear when the recording begins, as well as when entering a session that is already in progress.


